Objective-C on Travis-CI
Recently Travis added support for Objective-C and there for OS X and iOS projects for continuous integration testing. I gather that people have previously done this with self-hosted dedicated Jenkins machines but since Apple is so aggressive about dropping support for previous versions of the OS it seems like a pain to have to replace your build server every few years. Enter Travis, a great hosted continuous integration server that hosts a huge amount of open source projects. I figured with this new support I could host some of my smaller libraries just to set how well it worked. The initial setup process was a bit tedious but I eventually got it to work.
Assumtions:
- You have a test framework already integrated with your project (I like Specta/Expecta)
- You have your project on Github in a public repository. Travis offers a pro account if you'd rather
Steps
- Create a
.travis.ymlfile in the root of your repository (leading dot is intentional). For many projects a file may just look like:
language: objective-cBy default Travis runs this script for Objective-C projects I was informed on Twitter that the current script that runs Objective-C projects is actually located here. It was originally created by Justin Spahr-Summers here. This script seems to run my projects without any issue, they just occasionally require more initial setup (we'll get to that).
-
Enable your repository in Travis' settings. From your Travis profile page (after signing in with Github) you should see a list of your repositories, you may have to press 'Sync now', where you can switch on the repository you're planning on adding.
-
Configure your project within Xcode. As I assumed above you already have a test target setup. You do have to do a few things in Xcode to make everything work correctly.
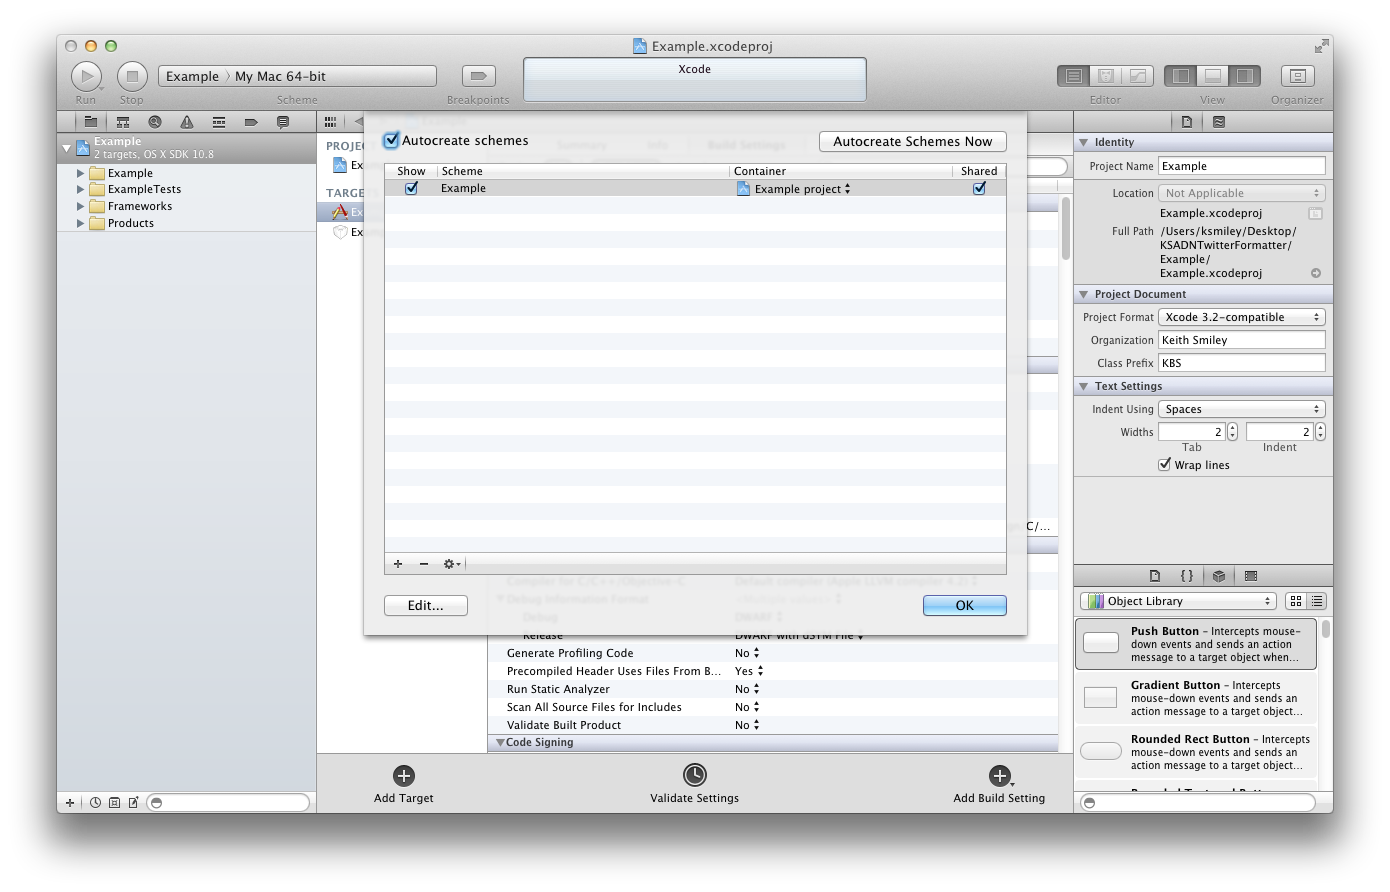
- Go to 'Manage Schemes' in Xcode.
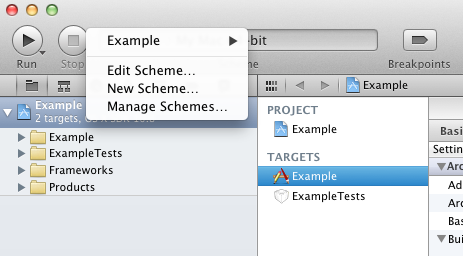
- Check the 'Shared' box for the scheme that needs to be run.
- Click 'Edit…' in the bottom left and go to your build action.
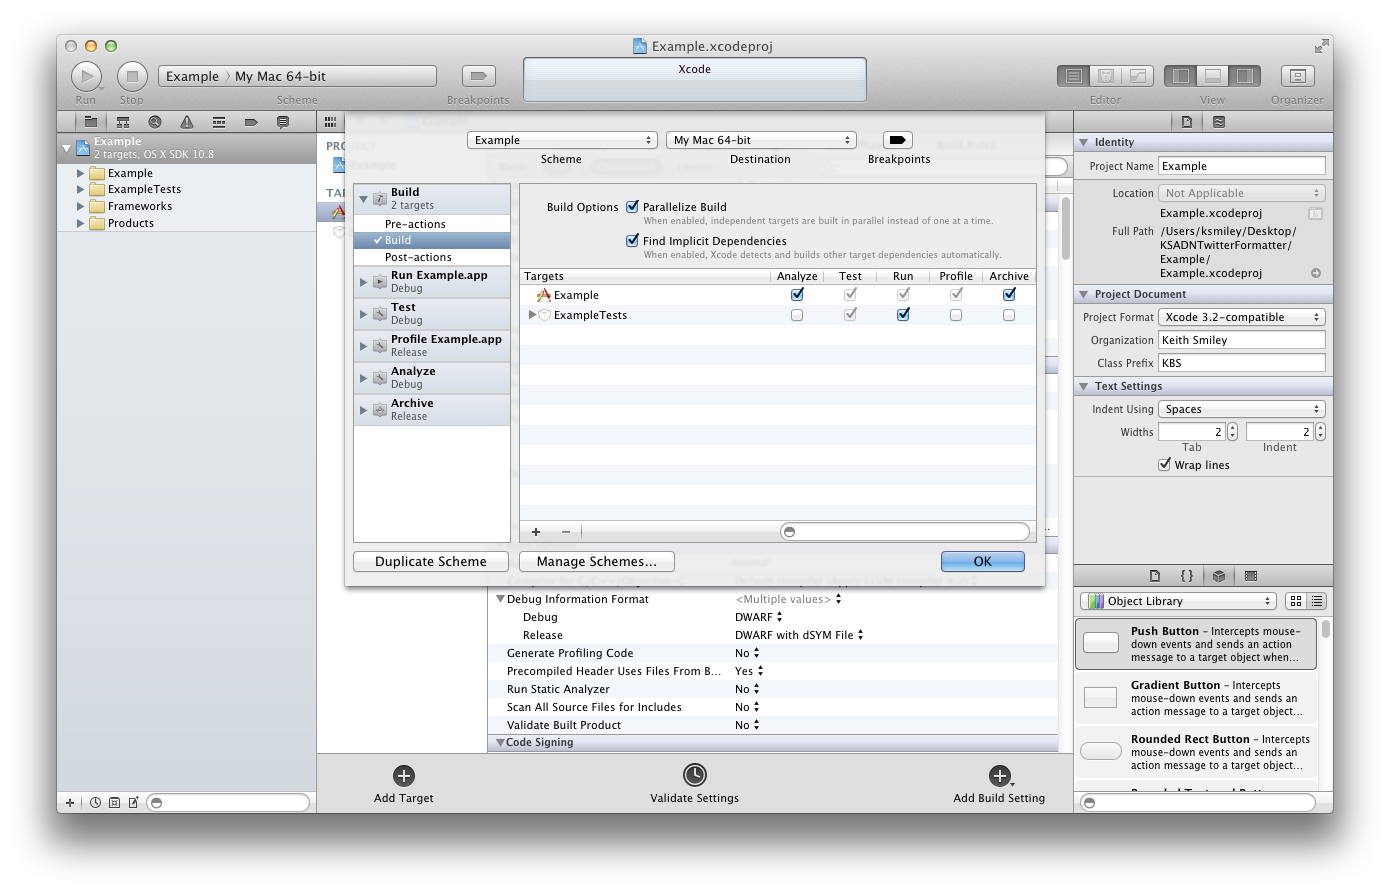
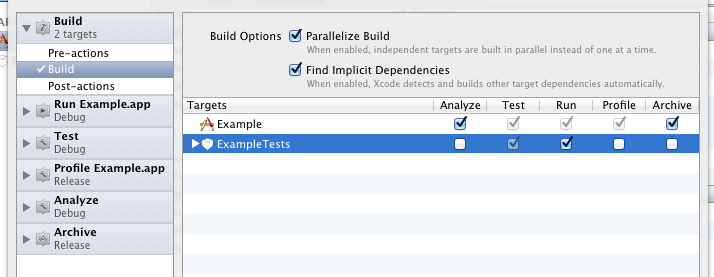
- On the row of your Tests target check the box in the 'Run' column.
- Go to 'Manage Schemes' in Xcode.
-
At this point for a simple project or a project using CocoaPods you should be good to go. If Travis finds a
Podfilein the root of your repository it automatically runspod installto get your dependencies (from their docs). Otherwise there are a ton of configuration options for your.travis.ymldepending on how your repo is setup.
For one of my projects I created a setup.sh file at the root of my repo that looks like this:
#!/usr/bin/env bash

git submodule update --init --recursive
echo "Setting up test frameworks..."
cd Example/Vendor/Specta; rake > /dev/null
cd ../Expecta; rake > /dev/null
echo "Done"
cd ../../../
This script which I run using the before_install: ./setup.sh option in my .travis.yml gets all my submodules, sets up Specta and Expecta and then goes back to the root directory for running. If you just have a few simple steps you can also have multiple before_install actions like:
before_install:
  - cd Example
  - make
You can read more about other Travis configuration options in their documentation.